Building a 4/12 pitch roof truss isn’t as complicated as it seems. With some guidance and the right tools, you’ll soon have a roof structure ready to stand the test of time.
This guide will help you understand the process and provide a step-by-step walkthrough of building your 4/12 pitch roof truss.
Step 1: Understand the Basics
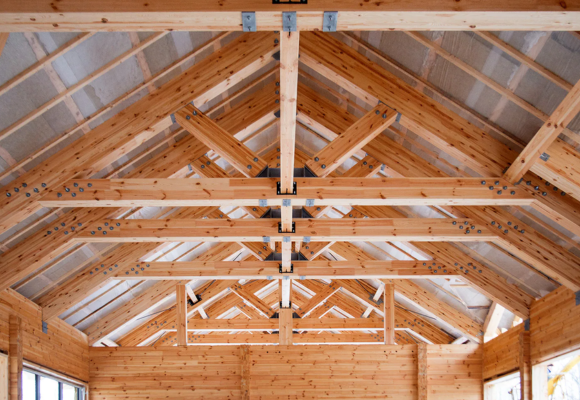
A roof truss is a triangular structure that forms the skeleton of a roof. It provides the support necessary to keep your roof stable and secure.
The 4/12 refers to the pitch or slope of the roof, where for every 12 inches the roof runs horizontally, it rises by 4 inches.
The right pitch is vital for weather protection and structural integrity.
Step 2: Design Your Roof Truss
Start with a detailed plan. Sketch your truss on graph paper, including the overall length and height.
Mark where each joint and post will go, such as the joist, king post, and angles for the truss. Consider factors like roof pitch, overall length, and your truss’s internal and external angles.
Now, we get into the fun part – designing the truss. You’ll need graph paper, a ruler, and a pencil.
A. Drawing Your Truss
Start by marking the overall length and height of your truss. Remember, the length will be the same as the width of the building, and the height will depend on your chosen pitch.
Once you have these measurements, you can draw the triangular shape of your truss.
B. Marking Your Joints
Once your truss shape is drawn, mark your joist and king post locations. These internal pieces help distribute the roof’s weight and provide additional support.
Step 3: Gather Your Materials
Every great project starts with a visit to the lumber yard or hardware store.
You’ll need various materials, including lumber, plywood, and gusset plates. It’s time for a trip to the lumber yard or hardware store. Key materials include:
- Lumber: Choose straight, strong pieces.
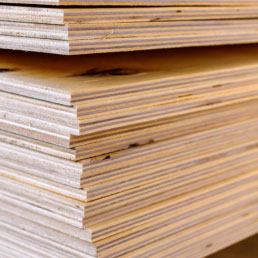
- Plywood: You’ll need this for the gusset plates.
- Adhesive: To secure the gusset plates to the truss.
- Gusset plates: To connect the joints of your truss.
- Screws: For added stability and strength.
A. Choosing Your Lumber
The main framework of your truss will be built from lumber. Ensure the wood is straight, with no obvious knots or weaknesses.
B. Gusset Plates and Adhesive
Gusset plates are used to connect the joints of the truss. You’ll also need a suitable adhesive for additional strength and stability.
C. Additional Tools and Materials
Don’t forget essential tools like a tape measure, sawhorse, drill, and a putty knife for the adhesive. Safety should also be a priority, so have goggles and gloves.
Step 4: Cut Your Wood
Using your plans as a guide, measure and cut your pieces of lumber to the correct size. Always double-check measurements before cutting, ensuring accuracy and precision.
Consider factors like the length, height, and angles when cutting. Remember to follow safety measures, wear your goggles, and use the right tools.
Step 5: Assemble Your Truss

Arrange your cut pieces according to your design. Then, apply adhesive at each joint, attach your gusset plates, and use screws to secure the plates. Check each connection point for strength and stability.
Step 6: Check Your Work
Once assembled, it’s essential to check your truss for any errors. Ensure it matches your original design and all joints are secure.
Any mistakes can lead to problems down the line, so this step is crucial.
Step 7: Install Your Truss
Once your truss is built and checked, you’re ready for installation. This step will depend on the specifics of your construction project.
Always ensure you’re following local building codes and regulations.
Conclusion
Building a 4/12 pitch roof truss can be an empowering experience. It’s a project that challenges you to learn new skills and apply your knowledge practically.
Safety should always be your top priority – take time, measure carefully, and wear protective equipment. With patience and precision, you’ll have a sturdy, reliable roof truss ready for installation.
Remember, this guide is a basic overview. Depending on the specifics of your project and your local climate, you may need to adapt these steps or add additional ones.
Always consult with a professional or a knowledgeable mentor if you’re unsure. Happy building!
Frequently Asked Questions
What is the angle of a 4 12 roof truss?
The angle of a 4/12 roof truss, also known as the pitch, is approximately 18.4 degrees.
This is calculated using the arctangent of the rise over the run, where the rise is 4, and the run is 12.
How tall is a 4 12 truss?
The height of a 4/12 truss, often referred to as its ‘rise’, can be calculated using the pitch and the horizontal ‘run’ of the roof.
If you have a 4/12 pitch over a 12-foot run, the rise would be 4 feet.
So, the truss’s height would depend on the width of the building, but for a 12-foot wide building with a 4/12 pitch, the truss would be 4 feet tall.
What is the formula for building roof trusses?
Designing roof trusses involves various calculations, depending on the type of truss you create.
However, the primary formulas revolve around the roof’s pitch and the building’s width. The formulas generally include Run: The horizontal distance the roof spans.
This is usually half the building’s width. Rise: Determined by the pitch. In a 4/12 pitch, the rise is 4 for every 12 of the run.
Slope Length: The diagonal length of the roof, which can be found using Pythagoras’ theorem: sqrt(run² + rise²).
What is the best truss spacing?
Truss spacing, or the ‘on-center’ distance, typically ranges between 2 to 4 feet for residential buildings, with 2 feet being the most common.
The exact spacing depends on factors like the roof’s weight, the local climate, and the building codes in your area.
Always consult with a structural engineer or follow local building regulations to ensure the safety and integrity of your structure.

Arthur is a skilled roof worker with over 10 years of experience in the industry. He started his career as an apprentice and worked his way up to become a foreman.
When he’s not working on roofs, John enjoys with his family or writing posts. He is also a passionate cyclist.