How would you react to seeing your beautiful home exterior’s cracks, headlining, and holes? Will that be abiding? No, for sure, but what can be the best solution?
As contractor experts, we suggest using elastomeric paints that provide more elasticity and protection to your surfaces, preventing cracking, chipping, etc.
Still, most users do ask does elastomeric paint needs primer. To ease you and provide the best solution, we would focus on the procedure required for elastomeric paints and the need for primer.
Primers are considered crucial steps before elastomeric paint as they enhance adhesion.
Does Elastomeric Paint Need Primer – Quick Answer
Yes, most elastomeric paint requires an additional layer where the primer is applied to the house exterior, especially to areas with cracks and hair linings, to make it water-resistant.
The primer application costs the user additional, and it does take time for proper application, but the results are overwhelming.
The overall adhesion seems to increase significantly after applying elastomeric paint; the dual coating makes the exterior look new, providing long-lasting protection, safety, and no additional color.
To know more about elastomeric paints, read till the end!
What is Elastomeric Paint?
Elastomeric paint is a much more robust version of acrylic. Upon application and after getting dried, it leads to an elastic coating that prevents water from leaking, making the surface water-resistant.
Elastomeric paint fixes cracks and hair lines on any surface, home exterior, or any other material that is prone to damage through environmental stress.
Paints work well for a few years, but in the case of elastomeric paint, their thick consistency is 10 X times higher than ordinary paints, and durability enhances the coating nature and makes it last longer and forever without additional color.
These paints tend to expand the life expectancy of the surface and overall integrity up to 10 years.
What is a Primer?
Primer or undercoat refers to an additional coating layer that masks the surface texture over a limit, making it more favorable for paints for better adhesion.
Primer prevents paint absorption or porous materials like wood and requires primer use of elastomeric paints.
Elastomeric Painting Procedure (With Use of Primer)
Does elastomeric paint need a primer? Now that you are familiar with elastomeric Paints and what a primer is.
Now, we would go directly to the primary procedure, where we would teach you how to apply elastomeric painting with a primer to make your home exterior look perfect without those previous hair Linings and cracks.
Before going to the primary procedure, purchase an elastomeric painting and a good quality primer or elastomeric primer compatible with your surface, offers high water resistivity, and enhances the ability to make the elastomeric paint get stuck.
Purchased high-quality products go for additional accessories for painting and applying primer, along with other steps we will discuss.
Requirements
So, what you will need, we have a list of requirements that you would require.
- Elastomeric Paint
- Primer
- Protection gadgets
- Paint brushes or roller
- Covering mask for the exterior doors and windows
- Water spray
- Scraper
- Bonding materials
- Buckets
- Cleaning clothes and cleaning agents
Step-by-Step Procedure
1. Physical examination and Trenching
First, you need to examine your home exterior or services that require elastomeric painting and search for spots with cracks, hair lining, or Areas where the paint seems to peel off.
Inspect the whole surface for such factors; mark the crucial areas requiring different primers while applying the elastomeric paint.
The next step refers to trenching, which is done by an expert and prevents moisture from entering the walls.
2. Cover up or mask additional surfaces
For the home exterior beside the walls, your paint might interfere with the doors, windows, and other surfaces, which make it sit un-professional and result in a poor appearance.
Secure the masking to prevent the painting from contacting the different textures.
Masking causes a high-class aesthetic finish. To mask the extra surface, users can opt for wide tapes or plastic coverings for surface safety.
3. Water pressure spray (water blaster)
Up till now, you might have done some simple steps that will help in the painting procedure, now getting to a bit crucial part that requires particular care.
Now, you have to take a water spray and set it to the desired level of 2,000 to 2,500 psi and use it to remove all the debris, mold growth, fungus, dirt, grease, dust, old paint, or any extra particles residing on the exterior surface.
The pressure applied would easily remove all, getting a clean and neat surface, but cracks remain, which seem to be fixed in upcoming steps.
4. Go for scrapping
After water blasting, start scrapping or sanding the left-over particulates, paint peelings, and more that would add clarity to the surface and free it from any additional particulates.
5. Fixing the cracks and crevices
In this step, the binding material is crucial, which would help you fix the notches marked previously or found during the scraping and sanding process.
Many bonding materials exist, but you can try them using a Weber Wall crack bond. But before using it, go for its use and compatibility with your surface.
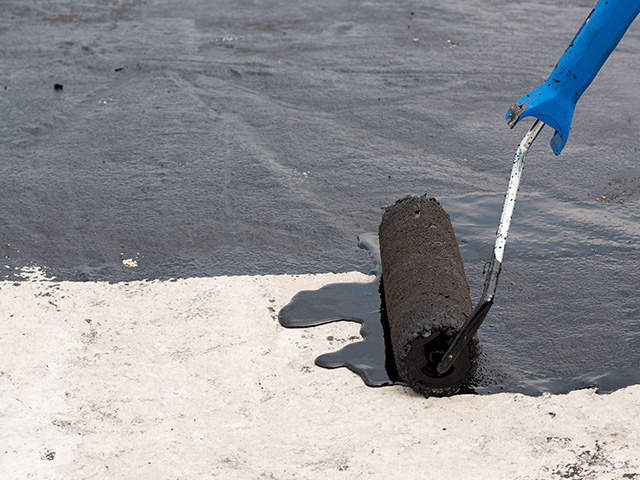
6. Priming (Use of primer)
Does elastomeric paint need a primer? Just before applying the paint coat, an additional step called priming is required where the primer is necessary.
The primer provides masking capability and water resistance, making the surface more moisture-resistant.
The primer would also enhance the adhesion of the paint, making it stick tight to it. Ensure the uniform coat of primer and consult an expert to get the desired consistency.
Primer may require at least 60 minutes to get dry; till that, you have to wait! Average drying time ranges from 01 to 04 hours based on environmental conditions.
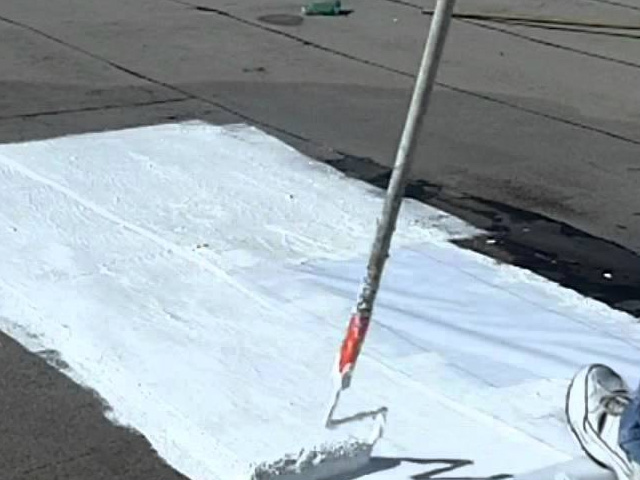
7. Elastomeric painting
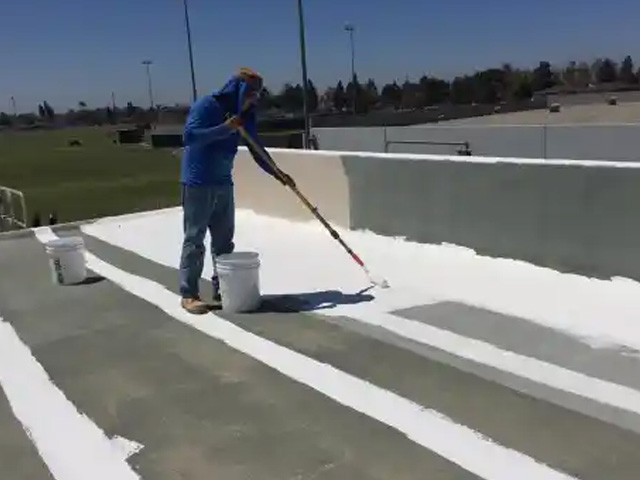
After an hour or two, when the primer is dried, the next step would be applying the paint coat uniformly over the house surface.
Apply two paint coats for at least 04 hours until the first layer dries out. Then, use the second one.
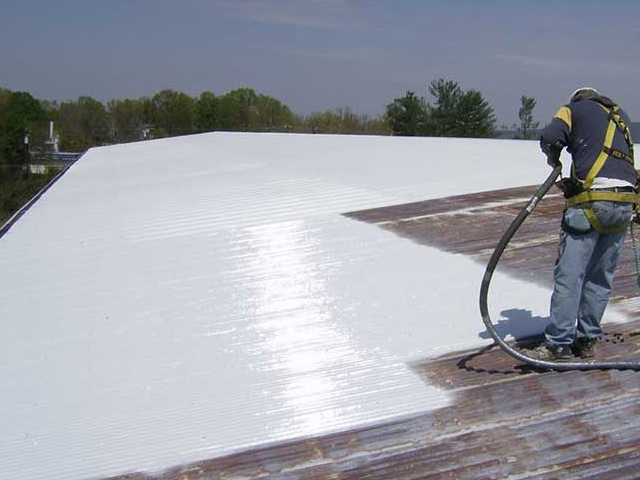
When the paint layers are applied, the overall look will change, and for almost ten years, the house exterior has been durable and resistant to harsh conditions.
8. End up
Clean the mess you created and remove all the makings once everything gets done.
The beneficial aspects of elastomeric paint
Elastomeric paints provide numerous benefits to your home exterior and satisfy you with their overall result. The benefits include;
- The Exterior surface becomes water-resistant
- The character gets back their integrity
- No need for other paints
- Provide ten years of durable longevity
- Long-lasting color retention over the surface
- Easily abide by harsh environmental conditions
- Resistant to rain, snow, UV, hot rays, winds, storms, and many more
- Prevent the growth of fungi and molds
- Prevent water leakage
- Attractive, appealing exterior texture
Conclusion
Going through a detailed procedure made you aware of the fact that “does elastomeric paint need a primer?” and yes, they do to make the hidden cracks and provide the best flexibility.
The paint can be applied, but adding a primer means adding stability, adhesion, and masking of the odd texture, which makes the appearance more elegant.
The combination enhances the stress-abiding capability, ensuring ten years of long-lasting paint.

Arthur is a skilled roof worker with over 10 years of experience in the industry. He started his career as an apprentice and worked his way up to become a foreman.
When he’s not working on roofs, John enjoys with his family or writing posts. He is also a passionate cyclist.